Showing posts with label fashion. Show all posts

Sunday, September 29, 2013

Falling for Cotton: Part Deux

Holy smokes, September has FLOWN by!  Between the Etsy shop, my PTA duties, my mom duties, and my kids' crazy schedules, I'm amazed I was able to finish this dress at all! Seeing as #fallforcotton ends on September 30th, I'm just squeaking in on the deadline.

Apparently, I'm a glutton for patterns of many pieces right now.  Here are the pieces for this dress:
Ack!  So many pieces!

Here are the edits I made to construct my dress:

First, I cut the back piece into two pieces just below the shirring lines and added 5/8" seam allowance on each new piece.
Marked

Cut

Due to the limited amount of skirt fabric I had, I also narrowed the front skirt pieces - the original has 3 pleats on each side, mine only has 2. 

I did end up using the floral fabric for the skirt, collar, and to do fabric covered buttons.  I read a great tutorial on doing fabric covered buttons without a kit here.

I have to say, this really is a comfy, do-anything kind of dress.  I wore it to church and received a compliment from a woman old enough to be my mother (or my mother's older sister), and then, when I wore it to pick up my son from school, received compliments from two 3rd grade girls, which pleased me to no end!

Front view selfie.
The back view.  I really need somebody to take my FO pics for me.

Behind every good dress is a good seamstress, and behind every great seamstress is a cat.

Monday, September 9, 2013

Pinkie Pink Pink - Oh, look! I made a jacket.

It's finally done!  The last installment (for now) of Pinkie Pink Pink is complete.  Admittedly, it's not quite as pink as I thought it was, really more into the burgundy tones, but that's okay - let's just go with it, shall we? 

Here it is, my new fall jacket, made of some lovely floral print velveteen:


I used the Simplicity 2057 pattern, which is part of their Project Runway line.  I omitted all the "extras" - welts, epaulets, tabs, etc. - since my print was so busy.  I opted for the pleated sleeves, which definitely give a nod to the 1940s.  Some people might say it's too much, but I disagree.  It is lined in an ivory flannel backed satin, which is so lovely.

Facing & lining.


The pattern itself was not very difficult, but cutting out the pieces took FOR-EV-ER!  At least a couple of hours.  I looked at the pattern reviews before starting this and while a couple of people suggested reducing the depth of the armholes, I didn't find a problem with the way they were on the original pattern. 

The back


I really couldn't be happier with this, and I anticipate getting a lot of use out of it.  Once the weather decides to cooperate, that is.  It's forecast to be 90 degrees for the next few days. C'mon autumn, get with the program!

See the shorts?  Clearly it isn't yet jacket weather.

Next garment up is the #fallforcotton dress. 

Thursday, September 5, 2013

Etsy love and an Announcement

A few words on Etsy. 

First, I love Etsy - some of my favorite jewelry items and gifts have come from Etsy.  What a great expression of boundless creativity!

Second, I love that Tim-freaking-Make-It-Work-Gunn loves Etsy.  There's a great interview with him where he talks about the world of craft here.  As if I needed another reason to love the man!

Third, I am reopening my Etsy shop, Moon Star Adri.   Here's a peek at what you expect to find...


PLUS, I haven't even taken photos of the envelope clutches I'm working on, which will also be for sale.

I'll be unrolling the above items and more in the next few days.  

Exciting times around here, I'm telling ya. 

Tuesday, September 3, 2013

Falling for Cotton

I came across the blog Lucky Lucille this weekend while browsing 1930s and 1940s patterns, and discovered that is running a sewing challenge called "Fall for Cotton."  The details are here, but in a nutshell, the challenge is to create a vintage-style garment in the month of September using 100% cotton fabric. 

I scored this fabulous fabric at Jo-Ann's over the weekend - originally $13/yd, got it for $3/yd! - although the bolt only had 2-1/3 yds left on it.
So, so, so in love with this print!
I want to make Gertie's Shirtwaist dress, but that requires 4 yards of fabric.  Clearly, I don't have enough. 

I'm thinking about the version on the left.
So here's my thought for this challenge - make the skirt portion of the dress, and maybe the collar in the floral.  Make the shirt part of the dress out of a muslin and possibly do fabric-covered buttons.  What do you think?  Am I on to something? I think this would be so cute with a little coral or mustard colored cardigan.

Friday, August 30, 2013

Pinkie Pink Pink - The Serious Business Pencil Skirt

It's finished!  Well, almost.  Here's the second of my pink projects - the Serious Business Pencil Skirt.  This is the Pencil Skirt from Gertie's New Book for Better Sewing. 

I still have to finish attaching the lining to the fashion fabric at the back slit and zipper opening and steam the whole garment, but I figured it was close enough to post pics.  What can I say, I'm impatient!
Please excuse the messy craft room.
I had some yardage of some medium weight stretch poly blend fabric I picked up years ago from a clearance table at Hancock Fabrics.  Originally, it was going to be a corset/miniskirt combo with tulle underneath, but I think this is a much better idea.
The back - a better picture of the fabric.  Please ignore the pins.

Somehow, when transferring the pattern markings onto my fabric I failed to notice that there are FOUR darts on skirt front, not two.  Oops.  I ended up having to take in the side seam allowances to make it fit (because I didn't realize the four-not-two error until after I had attached the waistband and I wasn't going to undo all that work).

One of my favorite things about this skirt is the hot pink lining.  I didn't have any pink thread, so when I hemmed it, I added a little black lace trim, which I think is a fun little detail.

Sassy!
I'll be sure to get some pic of it on me and post them.

My next pink project is a jacket from Simplicity's Project Runway collection.

Monday, August 26, 2013

Craft-o-Mania...or, I'm a Crazy Person.

A few weeks ago, a series of fortunate events led to me striking up a friendship with the mom of one of my son's kindergarten classmates.  She is also into knitting and mentioned an upcoming craft fair in November.  We decided to split a booth/table together to sell our wares or, as I like to think of it, fuel our craft habits.   Now that my son is back at school, I have a few hours in the day of quiet (so nice!) and I'm diligently at work on items for the fair.  My items are mainly beaded earrings, sewn clutch purses/wallets, and knit cowls.  I know it's kind of a crazy variety, but it fuels my crafting ADD.

I am waiting for a supply order for my jewelry, but in the meantime I thought I'd share a couple of one-offs I did while I was waiting, plus a new cowl.

Clearly I've got a red and gold thing going on with my jewelry right now...

You can't really tell in this picture, but there's a dark blue metallic thread that runs throughout this.

Cowl based on the Puckered Cable Stitch
Now, I'll be honest - I'm kind of nervous about this craft fair.  Partially because I have NO IDEA how many people will be attending, so I have no idea how much stuff to make.  Plus, there's the issue of pricing, which is always stressful.  Then, there is that nagging critical voice that keeps telling me my stuff isn't good/interesting enough.  I hate that voice.  I guess the worse case scenario is nobody buys anything (heartbreaking!) and my family & friends end up with handmade gifts.  

Have you done any craft fairs?  Have any insight or advice?  

Friday, August 23, 2013

Pinkie Pink Pink - Everything's Coming Up Roses

Apparently, I've been on a pink kick.  This is rather odd, as pink is not exactly one of my favorite colors.  I just finished one project (below) that is all about pink, have one in progress that's black and pink, and another on deck in burgundy/pink tones.  Heck, I've even got pink fingernails!

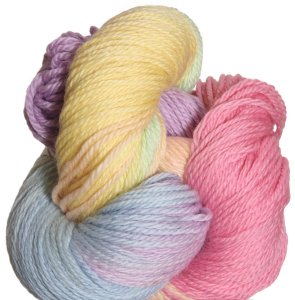
A couple of years ago, I got a cake of this handspun yarn by a most awesome friend.

Thank you, Stacey!
It's been sitting in my stash since then, since I was never sure what to do with it.  Last weekend, for some reason or another, I got the sudden urge to make something PINK so I dug it out of hibernation.  A quick search of Knitty's 'Knittyspin Index' yielded the perfect pattern, Grey Gardens, a one-skein entrelac turban.

Now, I'll be the first to admit that before this project, I had never attempted anything entrelac - it looked really difficult!  Although my version is certainly not perfect, I'm pleased to say it was much easier than I anticipated. The only real difficulty I had was that I ran out of yarn with one edge triangle and the four finishing triangles to go.  This handspun was the only pink yarn I had, but luckily I had some yardage of worsted weight Lorna's Laces Shepherd's Wool in Happy Valley left from another project.  I trimmed out the pink bits and used those to finish the project.

The color match isn't perfect, but it was the closest I had on hand.  Plus, it shows up on the back of the turban, and how many people are looking at the back of my head, really?  The biggest downside of this fix was definitely weaving in a dozen or so ends.  Ugh!

Here's the finished (and unblocked) product, "Everything's Coming Up Roses":
The front

The back with the emergency yarn

And here's a silly selfie of it on me.  The color is more true in this picture than in the above ones.  In this shot, I'm wearing it folded in half - otherwise it looks like a fancy bathing cap.

I definitely plan on making another of these, although I'll probably reduce the width by half.  I am excited to try it with a variegated yarn!

EDIT: I forgot to add this link I found to a "universal enterlac pattern."  It's a formula, or recipe, for doing entrelac work.  


Friday, August 16, 2013

A Wardrobe for Autumn

August is, in general, not my favorite month.  In fact, it may be my least favorite month - Mother Nature assaults me with every possible allergy-inducing pollen and I spend the entirety of the month with watery eyes and a stuffy-but-also-runny nose.  The only redeeming feature of August, as far as I'm concerned, is that it means fall is on the way. 
I love fall.  I adore fall. Pumpkins, apple cider, changing leaves, and cooler temperatures - excellent.  To me, there is nothing better than pulling the cardigans and boots out of the closet.  We've had a few cool mornings here, and I'm already geeking out for autumn and all my yummy warm clothes.
My friend Mariah recently mentioned that she was sewing a fall wardrobe - a few dresses, skirts, shirts, and pants - and it got me to thinking about my cold weather clothes.  I don't really have a cohesive non-work wardrobe, mostly I purchase things that catch my eye without much thought into how it fits in with everything else.  I don't necessarily need a TON of clothes, but  I'd love to have a go-to set of casual (yet stylish) clothes that work together, and I think sewing a few pieces would be a great step in the right direction.

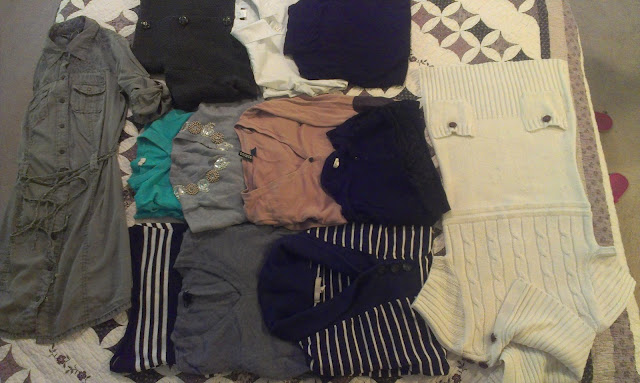
I started by taking an inventory of what I already have:
3 skirts, 2 pairs of trousers (1 pair cropped), 2 pairs of jeans (1 pair suitable with heels only), LOTS of stockings & tights
5 cardigans, 2 tunic-length sweaters, 1 dress, 2 oxford shirts, 2 pull-over sweaters.
As you can see, I own a lot of stockings and tights, but not many skirts or dresses.  I also own quite a few cardigans, but very few pieces to go underneath.  Also, I have no fall-weather jacket.  My old jacket has seen far better days and needs to be retired.

So this is the plan: make a jacket, two skirts, a pair of pants and two dresses.  I already have fabric for the jacket and a fabric that could be for a skirt or pants - just not sure which one yet.

I've started a Pinterest board of patterns and fabrics I'm considering for this endeavor.  Check it out here. 


Friday, August 9, 2013

Super superheroes!

Do you ever have a moment where fabric calls to you?  By 'calls' I don't just mean the impulse to BUY ALL THINGS when you walk into a fabric store (because that happens to me all. the. time), but that moment when you see a fabric and know that you must have it, and know exactly what it's going to become.  I had one of those moments a couple weeks ago when I was perusing the Jo-Ann's weekly direct mail flyer, of all places!  Usually I just browse to see if there are any big sales on patterns or arts & crafts supplies - I run a weekly small group arts & crafts club - but I rarely look at the fabrics.  I'm afraid years of going to quilt stores with my mom has turned me into a bit of a fabric snob.  At any rate, there was a sale on licensed fabrics including Marvel superhero fabrics.  I saw this one and knew it was destined to become a dirndl skirt.

Avengers and uh...other Marvel heroes - assemble!
Coincidentally, Gertie has a great dirndl skirt tutorial over at the Blog for Better Sewing, so I just had to buy the fabric.  On my son's suggestion, I paired the fabric with a gold zipper, which I think gives it that little bit of extra superhero bad-assness (bad-assery?)

I bought 2 yards of fabric, which was more than enough for my project. The fabric is 44" wide, which means I was able to cut two strips the width of the fabric and 27" high.  I cut two waistband pieces 30" long and 2" high.  I hemmed the skirt to 22" - the deep hem lets the skirt hang nicely.

Here's a pic of the finished result:

I had quite a lot of fabric left over - I almost always buy extra - so I decided to make a pair of shorts for my son.  All of my children's patterns are for babies and toddlers, which, despite my delusions to the contrary, he is neither anymore (hello first grade!)  I found a great tutorial on drafting boys' pants based on a pair of existing pants over at Schwin &Schwin.  I grabbed a pair of my son's pants, busted out a roll of the kids' art paper and got to tracing.  I widened the leg openings a bit, as I'm pretty sure that even though skinny jeans are 'in', skinny shorts are not.

One of my favorite things about the Schwin & Schwin tutorial is the faux fly detail.  One thing I really didn't want was for these shorts to look like pajama shorts.  You know the kind - one pattern piece per leg with a fully elasticized waist.

My son is at the age where he loves to have pockets for his "treasures" - pennies, acorns, rocks, etc. - so I added some front pockets.  I had some left over binding from my walkaway dress, which I though would make a fun pocket, belt loops, and waistband accent.


These shorts were quite quick to make, they took me just over two days.  I probably could've cranked them out in one if I would've been kid-free for a day.

Here's the "modeled" shot of the shorts...
He wasn't really in the mood to have his picture taken.

...and here they are in action on the way to the National Aquarium. 

Siblings striking a pose.

Now, I just have to be careful that we don't accidentally go all matchy-matchy, since my skirt and his shorts have become our "go-to" wardrobe items.  Of course, this has already happened, but I'm trying to keep it to a minimum.  I will say that the skirt has become quite the conversation starter - I wore it on a date night with TMS and got many (positive) comments from passers-by, and when I wore it to Jo-Ann's the other day, I gained a fan in a little nearly-3 year old boy there with his mom to buy fabric for superhero capes - he was having a superhero themed birthday party.  And really, how can you NOT feel awesome wearing this type of skirt?

My next thought is to do a whole Avengers-themed series of dirndl skirts...is that overdoing it?  I don't think so!  As a bonus, I get to represent Antman and Wasp, who were totally left out of the Avengers movie franchise (for shame, Whedon!)


Monday, August 5, 2013

Conquering the Walkaway Dress

If you like mid-century fashion and you like sewing,  you've probably seen the Butterick 4790 pattern, also known as the Walkaway Dress and originally numbered as Butterick 6015.  A wrap dress in 3 pieces with only 3 seams this dress was originally released in 1952.  According the the Vintage Patterns Wiki,

"...[I]t was dubbed the 'walk-away' dress, because it was so easy you could "Start it after breakfast... walk-away in it for luncheon!".
It's simple yet flattering wrap design and easy construction were what made it so popular. Sales of the pattern were so great, that at one point manufacturing of all other patterns ceased, and only the 'walk-away' dress was produced until all back-orders for this dress could be filled."
 One look at the pattern's front illustration and you can understand why this dress was a phenomenon unto itself - it looks effortlessly elegant.

I mean, look at the girl in the blue version - she's like Elizabeth Taylor going to the farmer's market.   The girl in the black and white dress looks so chic and polished (and OMG the gloves!!)  To achieve that sort of glamour with a pattern billed as "Quick & Easy", well who wouldn't want to make this???

Unfortunately, the photo accompanying the reissue of this pattern isn't nearly as flattering...

This is either the world's fanciest hospital gown, or fluffiest apron.
Despite the questionable image above, I was determined to make this dress.  I read a lot of reviews from other home sewers and found all sorts of fit issues.   Luckily, I happened on a great tutorial on how to make a finished garment that looks like the pattern illustration on Edelweiss Patterns' blog.  I bought a fun cherry print fabric in a cotton/poly blend from Amazon - the black was not as saturated as I would've liked, but the fabric had a really nice, crisp hand, which worked very well for keeping the circle skirt flared without the aid of a petticoat. 

How retro!  How fun!
I made the modifications suggested by Edelweiss Patterns - turning all biases to the inside, redrawing the upper back piece to taper out in a diagonal line so that the front closure is less of a U-shape (as the above photograph shows) and stays true to the V-shape of the original drawing - and also made a number of modifications of my own. 

First, I took ~2 inches off the front piece at the waist.  I'm quite short waisted and found that when I wrapped the front piece, it closed below the narrowest part of my waist.  This resulted in a bizarre (and unflattering) shifting of the front up, so that the shoulder seams were actually sitting above my shoulders.  Speaking of shoulders, I also rounded the shoulder seams, taking in 1/2 inch at the collar side and increasing to 1 inch on the arm side.  I had read another review of this dress where the dress wearer complained that the dress kept pulling back, which the sewer contributed to the weight of the circle skirt being much heavier that the front sheath piece.  There may be some truth in this, although I found my alterations solved this problem.  Just to be sure, though, I finished the circle skirt with a very narrow hem, but the front with a deep hem, to give it a little extra weight. 

Here's the finished product on Colette, my dress form (please excuse the mess):


After taking the dress out for a test drive, I realized that even though I had added an extra snap to the front closure (bringing the total to 4 snaps), I still had a near wardrobe-malfunction when setting my toddler down.  Luckily, this was easily remedied by a hook-and-eye closure. 

Hook-and-eye and four snaps - do you think I'll set off a metal detector?
All in all, this is definitely a pattern I'd make again, and has garnered tons of compliments from strangers. 


Friday, August 2, 2013

Bow-tie Blouse Remixed

It is a well-known fact that I have a huge crafting crush on Gretchen Hirsch of Gertie's Blog for Better Sewing.  Recently, my mom bought me her book, Gertie's New Book for Better Sewing, which I think we are supposed to be "sharing."  Sure.  At any rate, I highly suspect that I will make every pattern in the book over the next year or so.  I've already done the Portrait Blouse - I may post it later, but it was a very straightforward pattern and a quick project.

This post, however, is about the Bow-tie Blouse.  For this project, I poached an old shirt from my husband's Give-to-the-Goodwill pile.  He bought this shirt at least eight years ago - he wore it on our honeymoon - from H&M.  I chose this shirt to upcycle because a) it's beautiful and b) it already has buttonholes done (what can I say, I hate doing buttonholes!)

Obligatory "before" pic.


I started by ripping apart the shirt at the side seams and removed the collar and sleeves from the body of the shirt.  In my enthusiasm to get to work  - and no, I did not do a muslin of this shirt, shame on me - I neglected to actually make sure the fabric was wide enough at the upper shoulder to accommodate the pattern width.  Newsflash: it wasn't.

I was a quarter circle short on each shoulder - both front and back.  You can see here where the fabric was missing (under the pins):

Oops!

To fix this, I cut out a new semicircle pattern piece, adding 5/8" seam allowance along the curved outer edge and removing the seam allowances at the shoulder seams on the original pieces.  Here's the new piece pinned:


And here it is from the right side. 


I think it gives a fun little cap/flutter sleeve effect and looks like an intentional design element instead of a screw up - at least, that's what I keep telling myself. 

The other modifications made were to trade out the standard men's oxford buttons for these nice black ones.  I know it doesn't scream "VINTAGE" quite like oversized fabric-covered ones, but it works.


 Also, I had to recut the collar band.  I've never thought of myself as being particularly stout in the neck, but the collar band cut to the pattern specs was a strangling me.  I lowered the neckline by about 1/2" all around and that fixed the issue.  I've read from other sewers that they've had the same issue. 

Here's the shirt in all it's refashioned glory...

My dress form, Colette, modeling for me.
...and here it is in action.
It's me!  And my duck friends!